Compressing an image always involves some tradeoff but in most cases, you can reduce file size significantly without any visible quality loss. The trick is knowing which format to use, how far to push compression, and where that line is before things actually start to look bad.
This guide covers practical ways to compress images without degrading them, whether you’re prepping photos for a website, sharing files, or just clearing storage.
What “Lossless” vs “Lossy” Compression Actually Means
Before anything else, it helps to understand the two types of compression you’ll encounter:
| Type | How It Works | Quality Impact | Best For |
|---|---|---|---|
| Lossless | Removes redundant data without discarding any image info | None pixel-perfect output | PNG, logos, graphics, screenshots |
| Lossy | Discards some image data to shrink file size | Minimal at moderate settings | Photos, JPEG, WebP |
Most online tools default to lossy compression but let you control how aggressive it is. At quality levels of 75–85%, JPEG compression typically removes 40–70% of the file size with no visible difference on screen or in print.
How to Compress an Image Without Losing Quality
1. Use an Online Image Compressor
The fastest option for most people. Upload your image, adjust the quality slider if available, and download the compressed version.
With Imganva’s image compressor, you can compress JPEGs, PNGs, and WebP files directly in your browser no installs, no accounts. It uses smart compression to reduce file size while keeping the image looking clean.
Good for: quick single-file compression, website images, sharing via email or WhatsApp.
2. Choose the Right File Format
Sometimes the best compression isn’t compressing at all it’s switching to a more efficient format.
| Format | Compression Type | Typical Use | Notes |
|---|---|---|---|
| JPEG | Lossy | Photos | Great compression, minor quality loss at high settings |
| PNG | Lossless | Graphics, logos, screenshots | Larger files but no quality loss |
| WebP | Both | Web images | 30–50% smaller than JPEG at the same quality |
| AVIF | Both | Web / modern browsers | Even smaller than WebP, still limited browser support |
If you’re working with PNG photos and wondering why they’re huge that’s likely the issue. Converting them to JPEG or WebP will typically cut the size dramatically. You can do that with Imganva’s image converter before or after compressing.
3. Resize Before Compressing
A 4000×3000 image displayed at 800×600 is carrying pixels nobody will ever see. Resizing to the actual display dimensions before compressing can reduce file size more than compression alone.
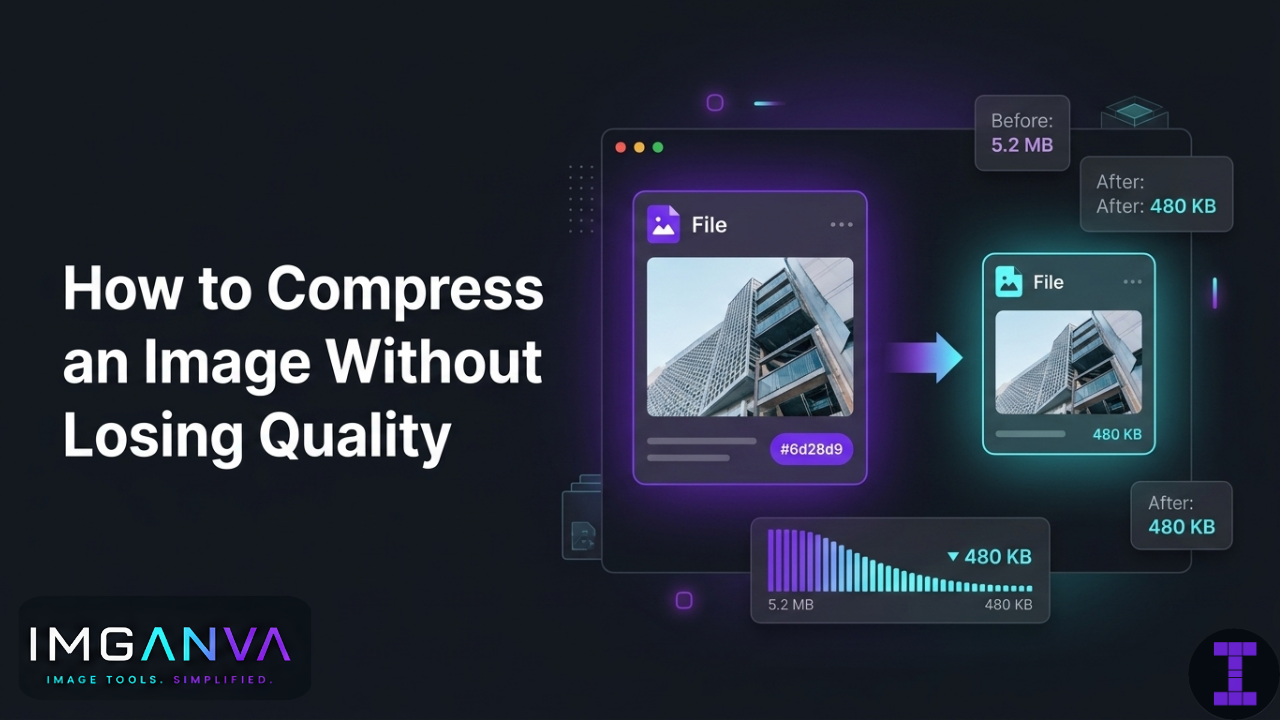
A photo taken on a modern smartphone can easily be 5–8 MB. Resized to 1200px wide and then compressed, the same image can drop under 150 KB with zero visible difference in a browser or social post.
Use a free image resizer to set the right dimensions first, then compress.
4. Strip Metadata
Every photo taken on a phone or camera carries embedded metadata GPS location, camera model, date, color profiles, and more. This can add 20–100 KB that has nothing to do with the actual image.
Most compression tools strip metadata automatically. If yours doesn’t, look for a setting to remove EXIF data during export.
5. Adjust Quality Settings Deliberately
If you have control over the quality slider, start at 80% and check the output. For most photos, 75–85% JPEG quality is indistinguishable from 100% quality at normal viewing sizes. Below 60% is where banding and blocking artifacts typically start to show.
PNGs benefit more from lossless optimizers. Tools like OptiPNG or the PNG optimization in Imganva’s compressor reorganize PNG data without throwing anything away.
When You’ll Always Lose Some Quality
A few situations where “no quality loss” isn’t really possible:
- Already-compressed images: Re-compressing a JPEG that was already saved at 70% quality will compound the loss. Start from the original whenever you can.
- Very small file sizes: Pushing a 5 MB photo down to 20 KB will always look bad. There’s a floor for any given image.
- Aggressive lossy compression: Any lossy method removes data permanently. At low quality settings, it becomes visible.
The goal isn’t to compress as hard as possible it’s to compress enough to meet your needs without the result looking worse than the original.
Recommended Settings by Use Case
| Use Case | Recommended Format | Quality Setting | Target File Size |
|---|---|---|---|
| Website header/banner | WebP or JPEG | 75–80% | Under 200 KB |
| Product images (ecommerce) | WebP or JPEG | 80–85% | 100–300 KB |
| Blog post images | JPEG or WebP | 75–80% | Under 150 KB |
| Social media | JPEG | 80% | Under 1 MB |
| Logos / UI graphics | PNG or SVG | Lossless | As small as PNG allows |
| Print / archiving | PNG or TIFF | Lossless | No restriction |
| WhatsApp / messaging | JPEG | 70–80% | Under 500 KB |
Frequently Asked Questions
Can you compress a JPEG without any quality loss?
Strictly speaking, no JPEG is a lossy format, so every save involves some data being discarded. But at quality settings of 80–90%, the difference is not visible to the human eye. Lossless JPEG re-encoding tools like jpegtran can remove metadata and optimize structure without touching actual pixel data, which is about as close as you’ll get.
What’s the best format for compressing images without losing quality?
PNG with lossless compression is the right choice when pixel-perfect output matters logos, screenshots, and graphics. For photos, WebP at high quality settings offers the best balance of small file size and good visual quality.
Does compressing an image reduce its resolution?
No, not unless you resize it. Compression reduces file size by optimizing or removing data it doesn’t change the pixel dimensions. Resizing and compressing are separate operations, though doing both together is often the most effective approach.
How much can I compress an image without it looking bad?
For JPEG photos, 75–85% quality typically looks identical to the original at normal screen sizes. Going below 60% is where most people start noticing blockiness or color banding. The right number depends on the image high-detail photos with fine textures are more sensitive than simple flat photos.
Is it safe to compress images multiple times?
Avoid re-compressing lossy formats like JPEG repeatedly. Each save introduces a new round of quality loss, and it compounds. Save your final compressed version once, and keep the original if you’ll need to go back to it.
What’s the difference between compressing and converting an image?
Compression reduces file size within the same or a compatible format. Conversion changes the format entirely like going from PNG to JPEG. Sometimes converting does more to reduce file size than compression alone. Both can be useful depending on the goal.
Does image compression affect SEO?
Yes, indirectly. Page load speed is a ranking factor, and large uncompressed images slow pages down. Compressing images to reasonable file sizes improves load time, which can help both rankings and user experience. Google’s PageSpeed Insights specifically flags oversized images as an issue.
Quick Summary
To compress an image without visible quality loss:
- Use a quality setting of 75–85% for JPEG photos
- Use lossless compression for PNG graphics and logos
- Switch to WebP for web images it’s consistently more efficient than JPEG
- Resize to actual display dimensions before compressing
- Avoid re-compressing images that are already compressed
- Strip metadata when file size matters
Most images can be reduced by 50–80% in file size with no visible difference if you pick the right format and stay within sensible quality ranges. That’s usually all it takes.